
You have got some options for adding some serious brick feng shui to your bedroom!
If you own one of the popular LEGO® wall pieces (the aesthetic LEGO® sets I list at the end of this post), there is a good chance this guide applies directly to you. Because now, you are wondering, “how the heck do I hang LEGO® art?” — and the answer might be simpler than you think.
What you actually need: for anything without a built-in hanger, the two things I use every time are a baseplate for the back and damage-free hanging strips. Every method below is a variation on those two. If you already have them, skip to my favorite method.

First: Most LEGO® Art Sets Come With a Built-In Hanger
Before we get into the creative DIY methods, here’s something a lot of people miss: LEGO® Art sets already include an integrated hanging system. Every LEGO® Art mosaic — the Great Wave (31208), Spider-Man Art (31209), Fauna Collection, and the 2026 releases like the Japanese Cherry Blossom (31218) and Claude Monet (31220) — has a Technic frame built into the back with a dedicated hanger bracket.
All you need is a nail, screw, or picture hook on your wall. The set hangs directly on it. No glue, no velcro, no baseplates, no magnets. It’s that simple. So if you’re wondering how to hang the Great Wave specifically: nail, hook, done.
Weight-wise, standard LEGO® Art mosaics run about 2–3 lbs (roughly 1–1.4 kg) when fully assembled. A standard picture nail in drywall can handle that no problem. The exception is the LEGO Art World Map (31203) — that monster is closer to 7–8 lbs and you’ll want to screw into a stud or use proper wall anchors.
The newer 2026 Art sets are worth a look: the 31218 Japanese Cherry Blossom (1,892 pieces, $139.99) is a 3D shadowbox-style piece with a waterfall that extends beyond the frame, and it can be wall-mounted or displayed freestanding. The 31220 Claude Monet (3,179 pieces, $249.99) recreates the iconic “Bridge over a Pond of Water Lilies” in collaboration with The Met. Both include wall-hanging hardware. And heads up, the Great Wave retired in July 2026, so if you’ve been eyeing it, you’ll have to hunt for it at other retailers or on the secondary market.
But what if you’re hanging a custom build, a MOC, or a non-Art-theme creation that doesn’t have a built-in hanger? That’s where these other methods come in.
For Custom Builds: Adhere the LEGO® Pieces Together First
If you’re hanging a build that doesn’t have a built-in Technic hanger — a custom mosaic, a MOC, or any set you’ve adapted for wall display — you want to ensure those bricks are stuck together before they go on the wall. Here’s why: if your LEGO® wall art falls, it will break when it hits the ground — and those pieces will shoot off in hundreds of different directions. A LEGO®-friendly adhesive ensures that if the wall art falls, chances are it will only be in a few pieces.
Le-Glue is an awesome compromise in this situation. The glue is a Shark Tank product brought to the building table by a small lad who wanted to keep his LEGO® together, but could ensure that they would still come apart at a later date. Yes, it holds the pieces together, but placing the bricks in warm water releases them. This allows them to be used again, meaning it is not permanent!

Now, choose one of these mounting methods!
1. The Lean-Back Method for LEGO® Wall Art
Sometimes the best nail is no nail at all. Prop smaller LEGO® art on:
- A floating shelf
- An empty row in a bookcase
- The fireplace mantel (mind the heat)
- A sturdy dresser or media console
Eye-level is nice, but placing a giant LEGO® Starry Night at foot-level can feel art-gallery chic. Add a couple of rubber bumpers on the bottom bricks so the piece won’t skid. The newer 2026 Art sets — like the Cherry Blossom Landscape (31218) — are actually designed for both wall mount and freestanding display, making this method a first-class option.
2. Ceiling-Drop & Picture-Rail Hacks
Walls off-limits? Go overhead.
- Drop-ceiling hooks clip to the grid and hold up to ~15 lbs.
- Bullet hangers swivel to keep art level — even on a sloped attic ceiling.
- Got old-school picture-rail molding? Snap in gallery rods and you have a full LEGO® Louvre without punching new holes.
Thread a bit of picture wire through Technic pin holes on the back of your baseplate for a stealthy hanger loop.
3. Micro-Hook Push Pins
Need barely-there holes smaller than a Technic pin? Grab clear micro-hook push pins. They leave a pin-sized scar you can spackle with a dab of toothpaste when you move out. Perfect for lighter sets like the LEGO® Art mosaics — anything under 3 lbs.
4. Magnet & Metal Strip Magic (Slightly More Expensive)
Screw a thin ferrous metal strip (or an IKEA SKÅDIS rail) into studs once and then forget about holes forever. Epoxy tiny neodymium magnets to the back of your LEGO® baseplates, and you can rearrange mosaics and LEGO® hanging wall art faster than you sort minifig accessories.
5. Build Your Own LEGO® Frame
One more purely brickish option: craft a studded frame five plates deep, embed a couple of keyhole bricks (or Technic bricks with cross-axle holes — the Technic Brick 1×2 with Axle Hole works great for this), and hang the frame itself on standard picture hooks. Bonus style points if the frame color-codes to the art inside.
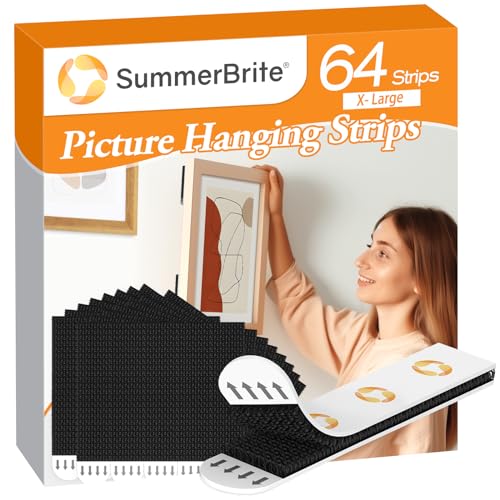
6. My Personal Favorite: Damage-Free Hanging Strips + Baseplates (No Nails Needed)
This method is two-fold: LEGO® baseplates and damage-free picture hanging strips (the velcro-style ones). It is more expensive but 1) it works, 2) it is secure, and 3) it causes the least damage to your walls. What you want to do is secure the back of the LEGO® wall art to baseplates, so that the underside or backside of the LEGO® art is smooth. Then, peel the hanging strips — 5 should suffice — around each corner and one in the middle, then secure to your wall. Of course, you will have to get the alignment right, but once it’s secure, it stays in place!
This method is best for custom MOCs and non-Art-theme builds that don’t have built-in hangers. If you have an official LEGO® Art set, the built-in Technic hanger method above is easier — but the hanging-strip approach gives you the flexibility to mount literally any flat LEGO® creation on a wall, no nails needed.
Hanging LEGO® Art Without Nails Or Drilling
No landlord fight required. If you can’t put holes in the wall — renters, dorm-dwellers, anyone with a security deposit on the line — go straight to the hanging strips + baseplates method or just lean the art on a shelf. If you want the option to rearrange your gallery every weekend, the magnet method is your friend — one metal strip, infinite layouts. Every method on this page except the picture nail works without drilling a single hole.
Make Hanging LEGO® Wall Art Easy
You just spent hours putting this LEGO® masterpiece together. If you are going to decorate your home or office, spend a little extra money to protect your walls, your LEGO® set, and your decor. Whether you lean, stick, hook, or magnetize, your LEGO® art deserves museum-grade treatment — even if that museum is your own bedroom. Always test your mount with a gentle tug before walking away.
And if you landed here without a set yet, these are the LEGO® Art pieces people most often hang:


*%5D(https://www.amazon.com/dp/B09JKVJCQZ?tag=baumlinks2626-20&linkCode=ogi&th=1&psc=1&ascsubtag=p7343-s1)
*%5D(https://www.amazon.com/dp/B0BL3HKT43?tag=baumlinks2626-20&linkCode=ogi&th=1&psc=1&ascsubtag=p7343-s2)
*%5D(https://www.amazon.com/dp/B07XFGD8T6?tag=baumlinks2626-20&linkCode=ogi&th=1&psc=1&ascsubtag=p7343-s3)
*%5D(https://www.amazon.com/dp/B09JKVJCQZ?tag=baumlinks2626-20&linkCode=ogi&th=1&psc=1&ascsubtag=p7343-s4)
*%5D(https://www.amazon.com/dp/B0BL3HKT43?tag=baumlinks2626-20&linkCode=ogi&th=1&psc=1&ascsubtag=p7343-s5)
*%5D(https://www.amazon.com/dp/B0BBSKBXQ2?tag=baumlinks2626-20&linkCode=ogi&th=1&psc=1&ascsubtag=p7343-s6)
*%5D(https://www.amazon.com/dp/B0BSRF3CN5?tag=baumlinks2626-20&linkCode=ogi&th=1&psc=1&ascsubtag=p7343-s7)
*%5D(https://www.amazon.com/dp/B0CGY1TRQQ?tag=baumlinks2626-20&linkCode=ogi&th=1&psc=1&ascsubtag=p7343-s8)
%5D(https://baumlinks.com/about-me/)
Frequently Asked Questions
How do you hang LEGO® Art on a wall?
LEGO® Art sets include a built-in Technic hanger bracket on the back. Just put a nail or picture hook on the wall and hang it directly — no extra hardware needed. For custom builds without built-in hangers, use damage-free picture hanging strips, micro-hook push pins, or the baseplate + hanging-strip method.
How do you hang LEGO® art on a wall without nails?
Three no-nail options: damage-free picture hanging strips on baseplates (method 6 — the most secure), the lean-back method on a shelf or mantel (method 1), or magnets on a metal strip (method 4) if you want to rearrange pieces later. Renters and dorm-dwellers should start with the strips — they hold a 2–3 lb mosaic and peel off clean when you move out.
Can you hang LEGO® art with adhesive hanging strips?
Yes — standard LEGO® Art mosaics weigh 2–3 lbs, well within the weight ratings of damage-free picture hanging strips. Use 5: one near each corner and one in the middle. Mount the art to baseplates first so the strips have a smooth surface to grip. The exact strips I use are linked above in method 6.
What do you hang LEGO® portraits with?
If it’s an official LEGO® Art portrait — Spider-Man, the Fauna Collection, any of the mosaic-style sets — use the built-in Technic hanger and a picture nail. For custom portraits and mosaics without a hanger, mount the build to baseplates and hang with damage-free picture hanging strips.
How much does LEGO® wall art weigh?
Standard LEGO® Art mosaics weigh roughly 2–3 lbs (1–1.4 kg) completed — light enough for a regular picture nail in drywall. The big exception is the LEGO® Art World Map (31203), which lands around 9 lbs and needs a wall anchor or a stud.
Do LEGO® Art sets come with a hanger?
Yes. Every LEGO® Art mosaic set — Great Wave, Spider-Man, Fauna Collection, the 2026 Cherry Blossom and Monet sets — includes an integrated Technic hanger bracket built into the back frame. You hang them on a regular nail or screw, no additional mounting hardware required.
Should you glue LEGO® Art before hanging?
Not for official LEGO® Art sets — the built-in Technic hangers hold everything secure. Gluing (with Le-Glue or similar) is for custom MOCs, non-Art-theme builds, or any creation without a built-in frame that you want to display vertically on a wall.

Matt Buxbaum · CEO at Baumlinks LLC
Matt B. spends his time arm wrestling, boxing, and most importantly, building LEGO®. His eclectic tastes give you dynamic information on all things LEGO® news and LEGO® product releases.
Latest from Matt: Why Is LEGO® So Expensive? We Ran The Numbers On 6,087 Sets · The Best LEGO® Minifigure Display Cases And Storage (2026) · The Best LEGO® Display Cases In 2026 (With Real Weight Data)